DIY Bookshelf Ideas to Build Stylish Storage for Every Home
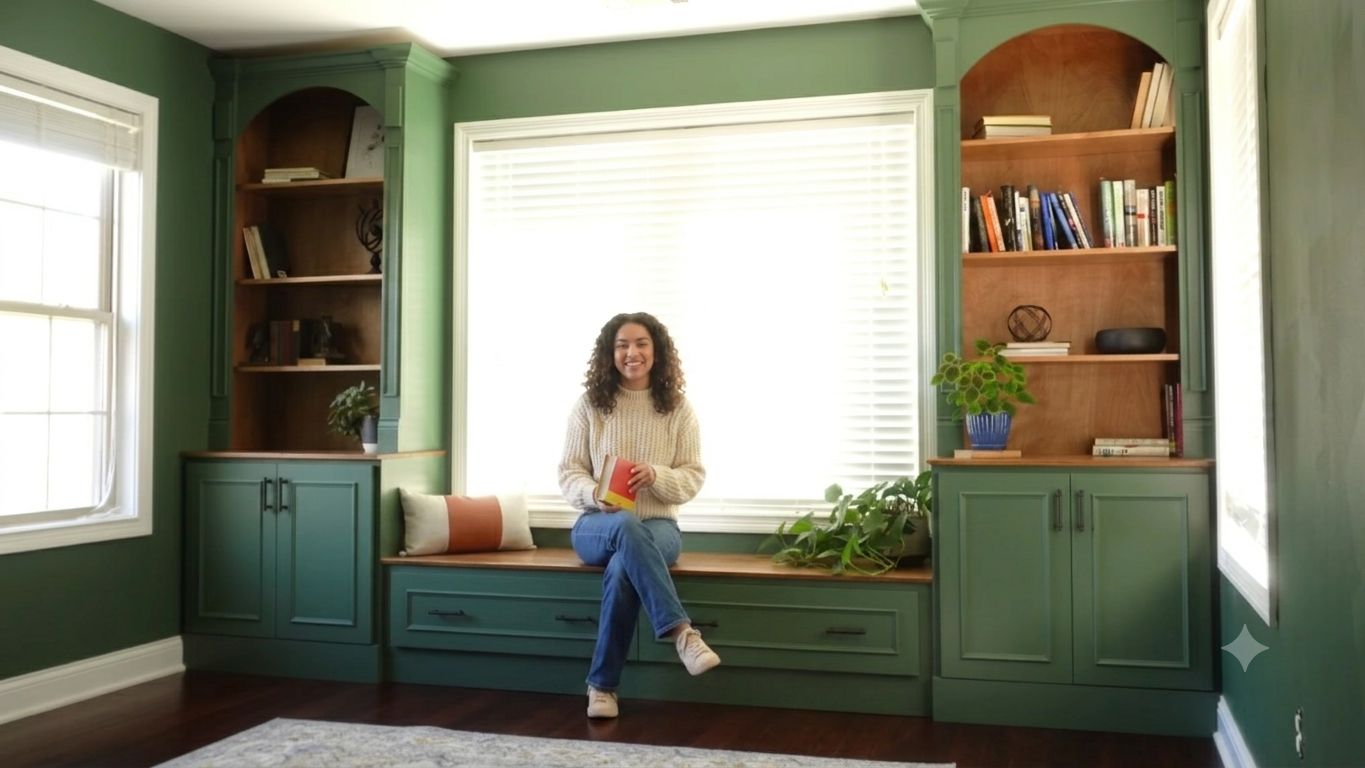
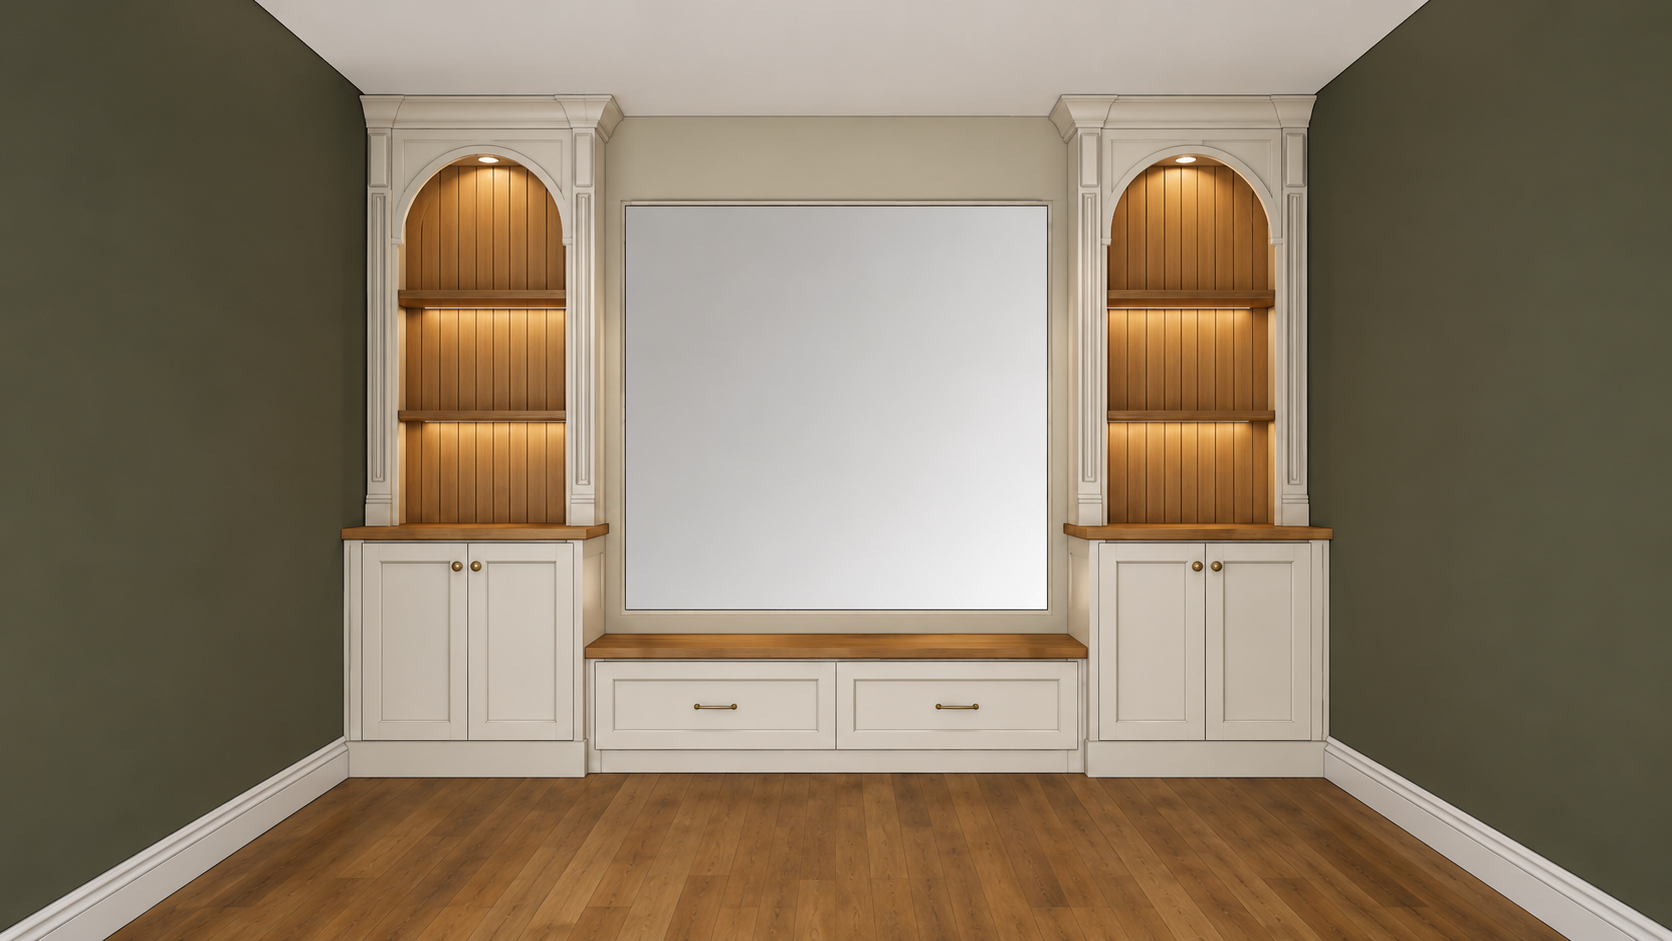
If you’re looking for a stylish way to maximize storage while adding a custom, high-end look to your home, DIY built-in cabinets with shelves and a window storage bench are the perfect solution. This project combines beauty, functionality, and smart organization, making it ideal for home offices, living rooms, libraries, or reading nooks.
In this guide, we’ll walk through the complete process of building custom built-in cabinets, upper arched shelves, and a storage bench beneath a window.
Why Choose DIY Built-In Cabinets?
Built-in cabinets offer several advantages over freestanding furniture:
- Maximize wall space
- Increase home storage
- Create a custom luxury appearance
- Improve organization
- Add value to your home
- Perfect for books, décor, office supplies, and hidden storage
Whether you’re renovating a home office or upgrading a living room, custom built-ins provide both style and functionality.
Materials Needed
Before starting, gather the following materials:
- 3/4-inch Birch Plywood
- 1/2-inch Plywood
- 1×3 and 1×4 Pine Boards
- Pocket Hole Screws
- Wood Glue
- Brad Nails
- Cabinet Hinges
- Drawer Slides
- Shelf Pins
- Edge Banding
- Decorative Trim
- Crown Molding
- Sandpaper
- Primer
- Paint
- Wood Stain
- Cabinet Handles or Knobs
Recommended Tools
- Table Saw
- Circular Saw
- Miter Saw
- Pocket Hole Jig
- Drill & Driver
- Nail Gun
- Clamps
- Level
- Measuring Tape
- Orbital Sander
- Stud Finder
Step 1: Plan the Built-In Layout
Every successful built-in project starts with careful planning.
Since the window sits in the center of the wall, the layout includes:
- Lower cabinets on both sides
- Tall upper shelving units
- A storage bench below the window
- Decorative arched tops
- Adjustable shelves
Measure the wall carefully and locate every wall stud before cutting any materials.
Step 2: Build the Base Cabinets
The lower cabinets form the foundation of the entire project.
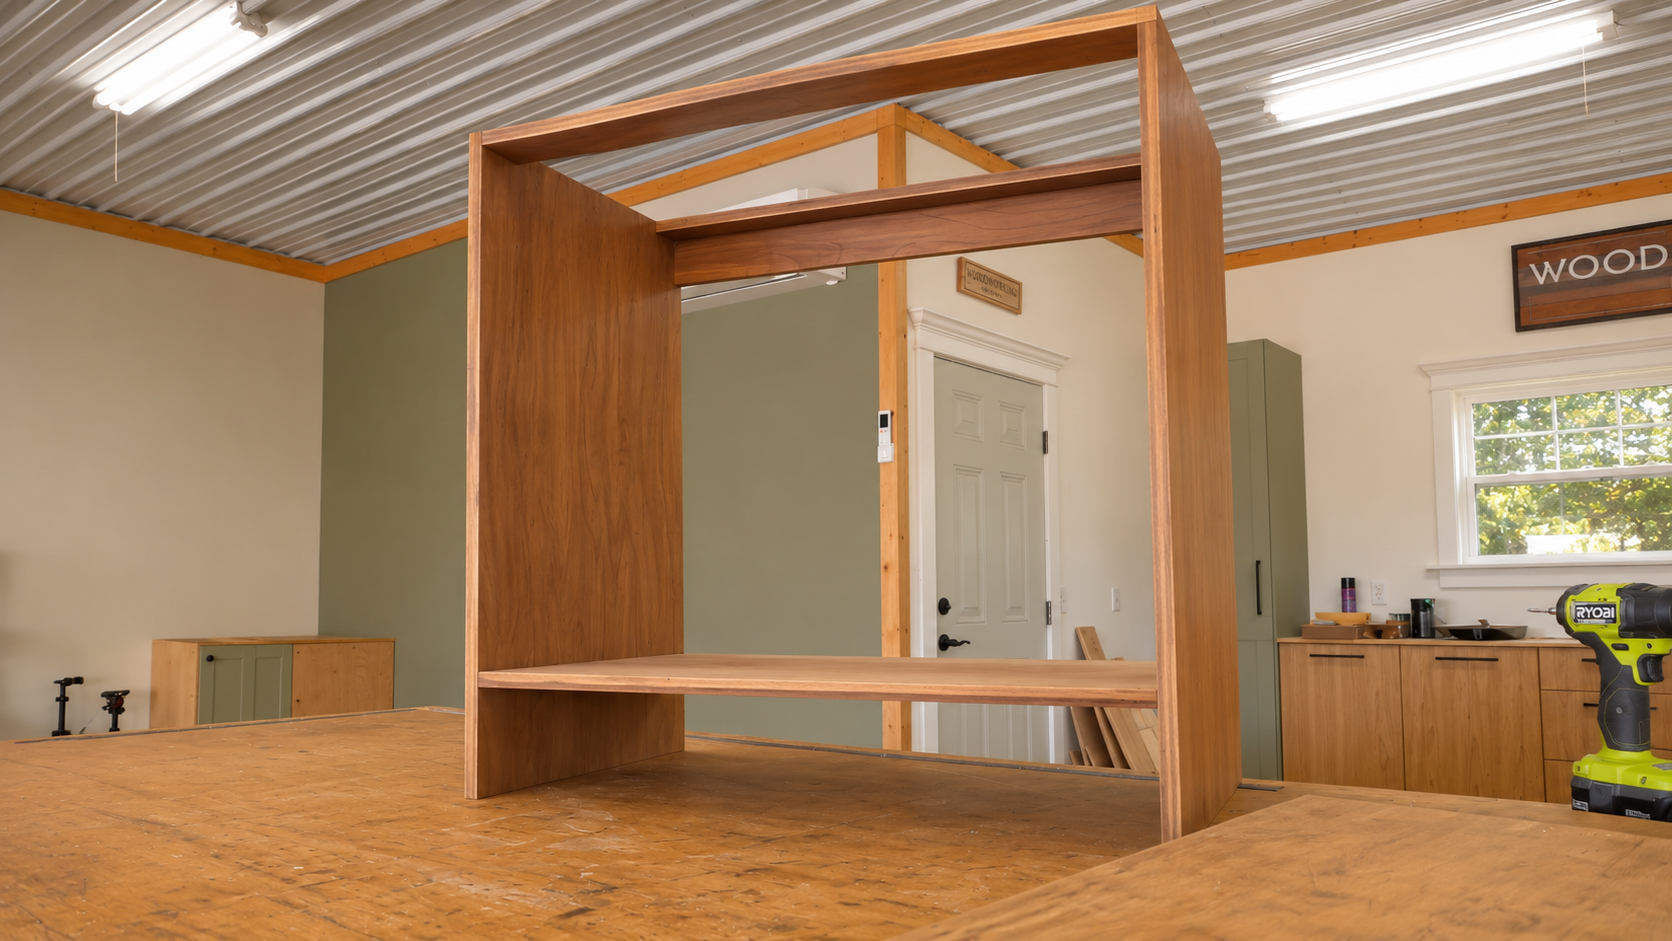
Cut cabinet sides, bottoms, tops, and stretchers from 3/4-inch birch plywood.
Assemble each cabinet using pocket-hole joinery and wood glue.
Make sure both cabinet boxes are perfectly square before attaching the back panels.
Step 3: Add Face Frames
Face frames give cabinets a professional furniture-quality appearance.
Build the frames from 1×3 boards and attach them to the plywood cabinet boxes.
Leave approximately a 1/2-inch overhang along the wall sides. This helps hide uneven drywall and creates a cleaner finished installation.
Step 4: Build Cabinet Doors
Cut shaker-style cabinet doors to fit each opening.
Apply decorative trim for added character.
Finish the edges using edge banding to hide exposed plywood layers.
After sanding, install concealed cabinet hinges for smooth operation.
Step 5: Construct the Upper Shelves
The upper shelving units are built using:
- 3/4-inch plywood sides
- Top panel
- Bottom panel
- 1/2-inch plywood back
These cabinets sit directly above the lower cabinets, creating a full-height built-in desig
Step 6: Create Decorative Arched Tops
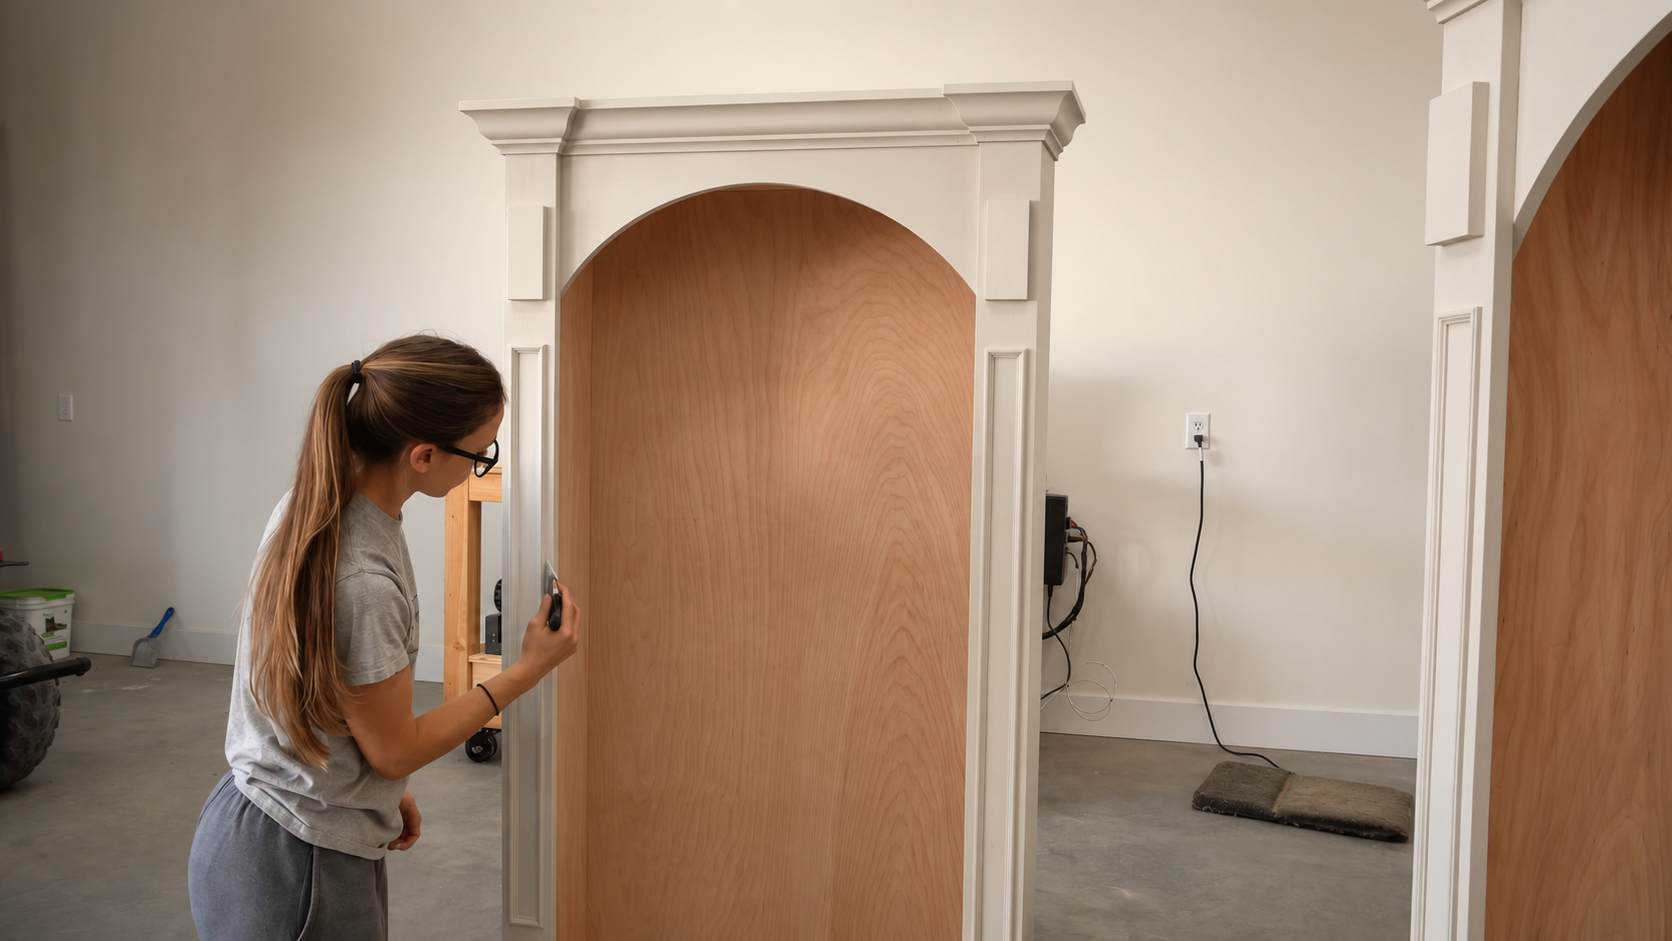
The arched shelves are one of the standout features of this project.
Mark the arch shape onto plywood and carefully cut it with a jigsaw.
Attach the arch securely using pocket holes and wood glue.
This design instantly gives the built-ins a custom furniture appearance.
Step 7: Install Crown Molding and Trim
Decorative trim transforms simple cabinets into elegant built-ins.
Add:
- Crown molding
- Face trim
- Rectangular decorative molding
- Side trim pieces
Leave approximately 2 inches of space between the cabinet tops and the ceiling for easier installation.
Step 8: Build the Window Storage Bench
The space beneath the window becomes a practical storage bench.
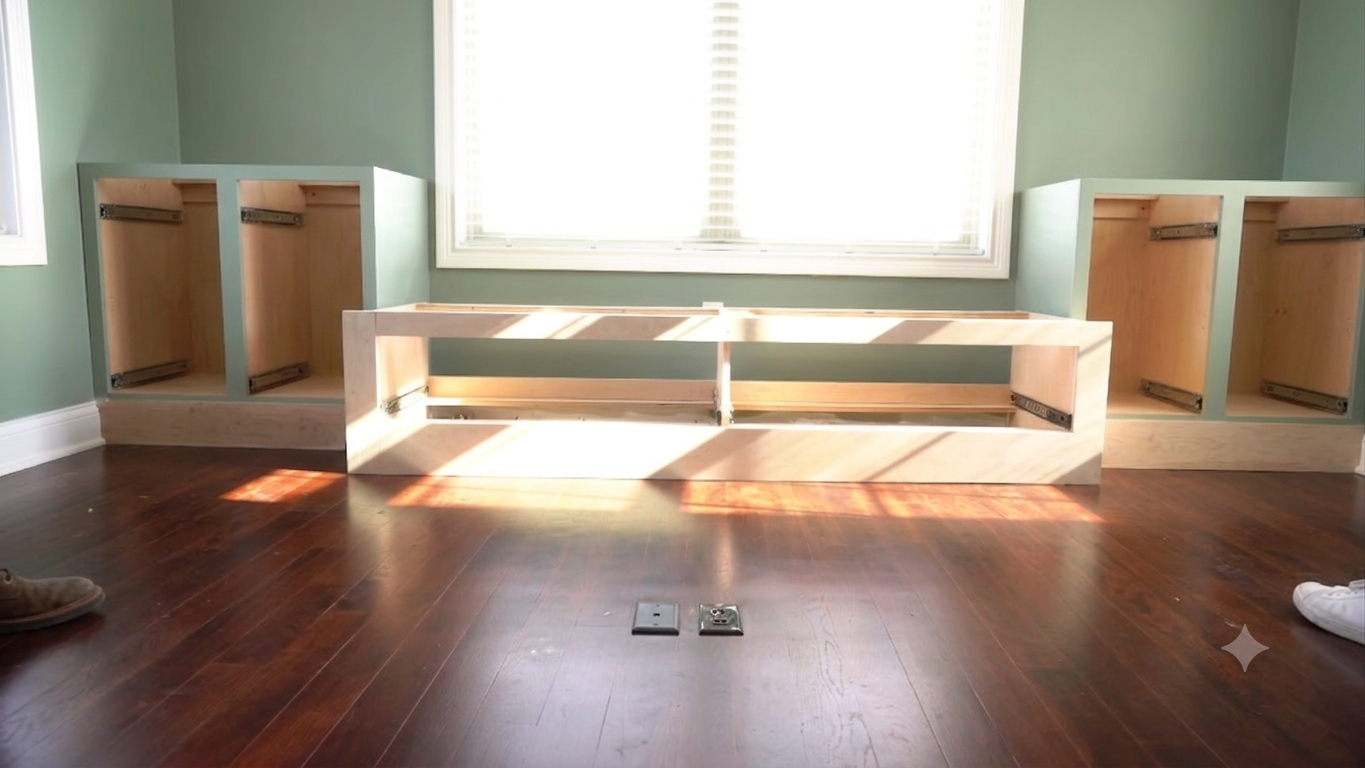
Build a sturdy plywood frame that fits perfectly between the two lower cabinets.
The bench provides comfortable seating while adding valuable hidden storage.
Step 9: Build Large Storage Drawers
Install two oversized drawers beneath the bench.
Each drawer includes:
- Plywood drawer box
- Full-extension drawer slides
- Decorative drawer front
- Matching trim
Large drawers are perfect for storing blankets, office supplies, seasonal décor, or children’s toys.
Step 10: Sand and Finish
Before painting, sand every surface thoroughly.
Apply edge banding where needed and fill nail holes with wood filler.
Wood Stain
The cabinet tops and shelf interiors can be stained using a warm wood finish such as Early American to add natural contrast.
Paint
Prime the cabinets first.
Finish with a rich green paint like Sherwin-Williams Basil for a modern built-in appearance.
Choose a paint color that complements your room’s walls and décor.
Step 11: Drill Shelf Pin Holes
Use a shelf-pin jig to drill evenly spaced holes inside each cabinet.
Adjustable shelves allow you to customize storage for:
- Books
- Decorative accessories
- Office supplies
- Storage baskets
- Plants
Step 12: Prepare the Wall
Before installation:
- Remove existing baseboards
- Locate wall studs
- Mark stud locations
- Check that the floor is level
Good preparation makes installation much easier.
Step 13: Install the Base Cabinets
Position each lower cabinet against the wall.
Level the cabinets carefully before fastening them to wall studs.
Secure the cabinets together for one solid structure.
Install the countertop or finished cabinet tops after everything is level.
Step 14: Install the Window Bench
Slide the storage bench into the center opening.
Attach it securely to both cabinets and the wall framing.
Install the completed drawers and confirm smooth operation.
Step 15: Install the Upper Cabinets
Lift the upper shelving units into place.
Secure them to:
- Wall studs
- Lower cabinets
- Adjacent cabinet sections
Fill any gaps with trim for a seamless built-in look.
Styling Your Built-In Shelves
Once the project is complete, decorate the shelves with:
- Books
- Framed artwork
- Small indoor plants
- Decorative baskets
- Ceramic vases
- Candles
- Picture frames
- Sculptures
- Storage boxes
A balanced mix of decorative and functional items creates a polished designer appearance.
Tips for a Professional Finish
- Measure every section twice before cutting.
- Use quality plywood for durability.
- Sand thoroughly between coats of paint.
- Caulk small gaps before painting.
- Install soft-close hinges and drawer slides.
- Keep shelves adjustable for future flexibility.
- Paint after final assembly for a seamless finish.
Final Thoughts
Building custom DIY built-in cabinets with arched shelves and a window storage bench is an excellent way to upgrade any room while adding valuable storage. Although the project requires careful planning and woodworking skills, the finished result looks like professionally installed custom cabinetry at a fraction of the cost.
Whether you’re designing a home office, library, or reading nook, these built-ins provide timeless style, improved organization, and long-lasting functionality. With the right materials, patience, and attention to detail, you can create a beautiful custom feature that enhances your home’s value and everyday usability.
Frequently Asked Questions (FAQs)
1. What plywood is best for built-in cabinets?
3/4-inch birch plywood is an excellent choice because it is strong, smooth, and easy to finish.
2. Can beginners build DIY built-in cabinets?
Yes, beginners with basic woodworking tools and patience can complete this project by following step-by-step instructions.
3. What paint finish works best for cabinets?
A durable satin or semi-gloss cabinet paint is ideal because it resists wear and is easy to clean.
4. Are adjustable shelves worth adding?
Absolutely. Adjustable shelves provide flexibility for storing books, décor, baskets, and office supplies.
5. Does a built-in storage bench increase home value?
Well-designed built-ins can improve both the functionality and visual appeal of a home, making them an attractive feature for many buyers.